This time, It's for a more computer-savvy user, my friend India.
All screenshots are from virtualbox windows.
***
First thing's first, we need a few definitions/points to be assumed before we get to the actual guide.
Linux
Linux is not an operating system, no matter what the idiots selling that netbook told you (That in particular was probably the horrendous "Linpus Lite" - Please install the Ubuntu Netbook Remix on that thing). Linux is a "kernel", the core of the operating system that deals with hard stuff like drivers and memory management. It powers operating systems in many phones (android phones, palm pre, etc), %60 of the Internet (including google and amazon's servers), the new york stock exchange, almost all supercomputers, and personal computers like yours.
KDE
The KDE project went through a bit of rebranding, so this is more up-to-date than most defenitions.
KDE is a project, a community of people, all designing software with their own libraries and graphical toolkits based off of C++ and the Qt toolkit.
The KDE SC (Software Compilation), formerly known as the product "KDE", is the biyearly released, monthly updated collection of KDE software. This includes the plasma desktop, with it's widgets and all, and many utilities to allow you to use your computer.
Package Manager
How you install stuff. See this blog post.
Kubuntu
An operating system designed with all of the underlying versions of the linux kernel and system utilities that Ubuntu uses, but replacing the graphical applications with KDE software, as opposed to GNOME project software.
It is released every 6 months, a few months after a major KDE SC release, so that they can get the benefits of the bugfix KDE SC releases.
Filesystems
NTFS :: Windows default File system, Linux OS's have been able to read/write for a few years now, as does Mac OSX. Use this on external hard drives.
HFS+ :: This is the default Macintosh FS. Only the Mac OS can write to this, but Windows (via bootcamp driver), Linux, and obviously Mac can read such volumes.
FATX or FAT32 :: The old default Windows FS. 32GB Limit. Linux used to have a patent issue with Microsoft over this, but this has been fixed by using different code. All major OS's can read/write. Use this for flash drives.
Ext4 :: The latest and greatest Linux FS. This is the Default FS in Kubuntu as of this release, whilst previously it was Ext3. Only recent Linux based OS's can read ext4 volumes. It is highly recommended for your system, but not external drives. You wouldn't use something like NTFS or Fat32 because Linux OS's need filesystem features like case-sensitivity, symbolic links, and more to run. (That and you'd want to use an open-source filesystem on an open-source operating system.)
Swap :: Linux typically uses an entirely seperate partition for what's known on windows as the "page file" or emergency RAM spillover.
Partitions
I assume that you know this one, but I'll cover it anyways.
Your hard drive is split up into many partitions, or maybe just one, but all hard drives that are being used have a partition table mapping out all available partitions, or contiguous volumes. Your hard drive may have a Windows Vista partition and a manufacturer recovery partition.
This you may not know, here's a quick guide to the device names on linux. This is useful when working with partition managers or formatters.
/dev/sda1
The first part "/dev" is the devices section of our file system,
"sd" is used for hard drives, I think it means sata disk, but it uses the term for older, non-sata devices too.
"a" means that it's the first drive plugged in.
"1" is the partition number.
So, /dev/sdc1, often what my usb stick is, is the third storage device plugged in, first (an in this case only) partition.
***
 First, simply choose English.
 Then I chose to choose the, top, "Live" option, you can skip many steps by going straight to "install" option, but I'll personally prefer the longer way.

First, if, like me it's in the way, move widgets around until you can axe the OpenDekstop.org widget, or the small one with all the junk on it.

Now we can choose to start the installer.

We still want English.

Timezone was guessed correctly.

I'll assume you're not using a European or Dvorák keyboard. Next.

Here's the important part, partitioning. This is a rather simple partition setup helper. Move the slider to determine how big the Linux area will be. The existing space (in this case windows is /dev/sda1). I'd say give Kubuntu a bare minimum 10 Gb, though 30 Gb is a more comfortable size.

When you are absolutely sure, click continue. It will make those changes to the partition table, resizing and creating.

Here we type in our full name, username (no capitol letters), password, computer name, and decide if we want autologin, encryption, or neither.

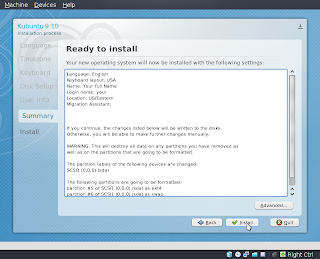
This page let's us review everything and then we click on okay.
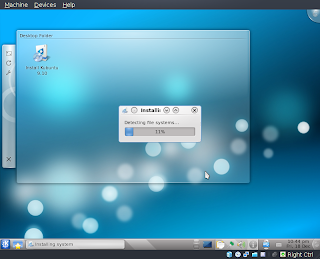
 They reduce the size of the installer, showing you only progress, letting you play around. If the computer is plugged into the internet, or connected wirelessly, it will download some extra stuff they couldn't fit on the disc.
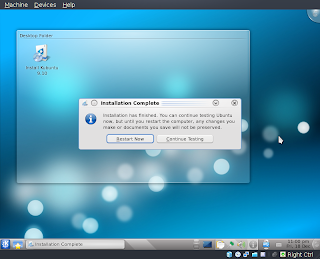
Choose to restart.

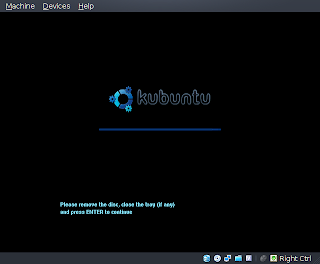
It'll spit the disc out. Take it and hit enter.
We've now installed Kubuntu. BUT WAIT! There's part 2! We've got it installed and we're able to choose between Windows and Kubuntu, but it's not setup the "right" way yet. There's still so much to do!
Read Part 2 here.
No comments:
Post a Comment